Thursday, March 28, 2013

Review and Swatches--Colores de Carol Best Polish Friend Forever

As promised, I have for you today my second polish (see the first here) that I purchased from Colores de Carol: BPFF (Best Polish Friend Forever). This was the polish that I wanted the most when Carolina first introduced her line. I love it even more on my nails!
*I purchased this polish with my own money and I am not affiliated with or compensated by any of the brands mentioned in this post.*


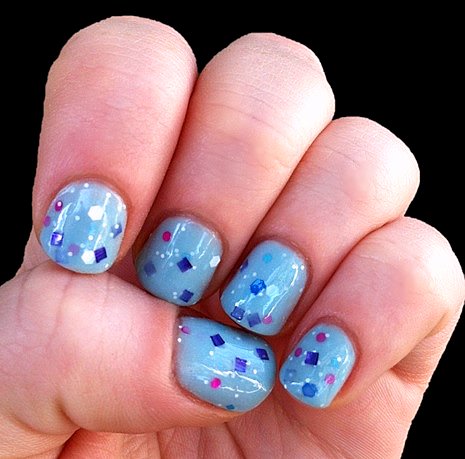
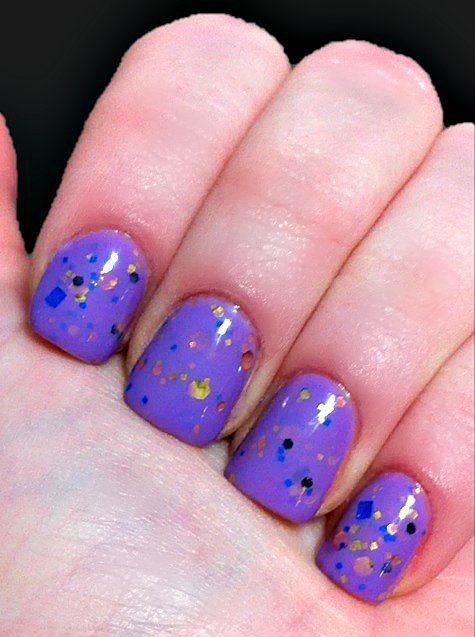
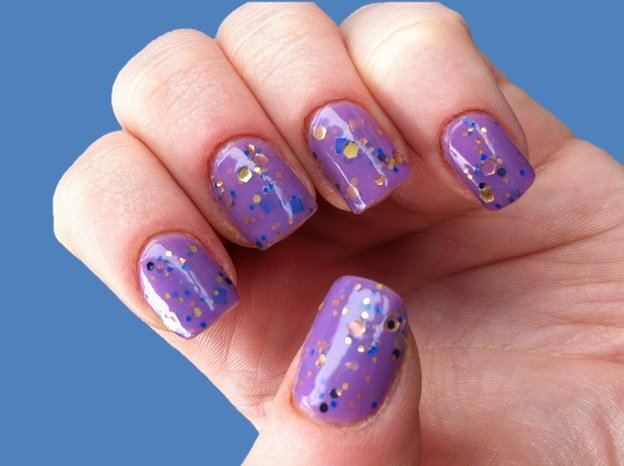
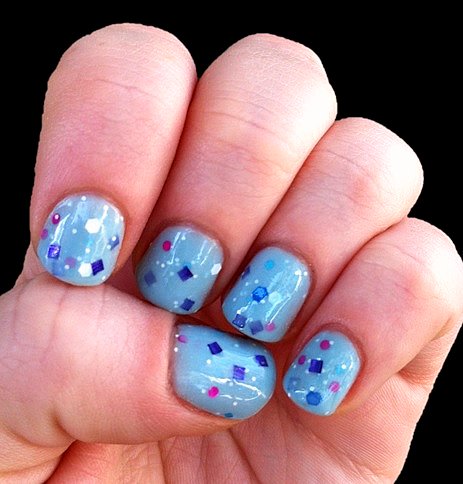
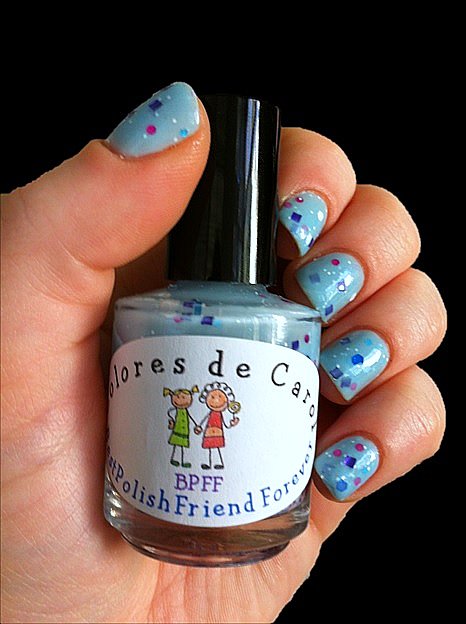
Carolina describes BPFF this way: "A slightly shimmery sky blue jelly base with small white hex glitter, large purple squares, small blue squares, teal and dark blue hex glitter and pink round glitter."--(source
Yeah, I would pretty much be sold just based on the description. But look at it! If a polish can be happy, this is a happy polish. 


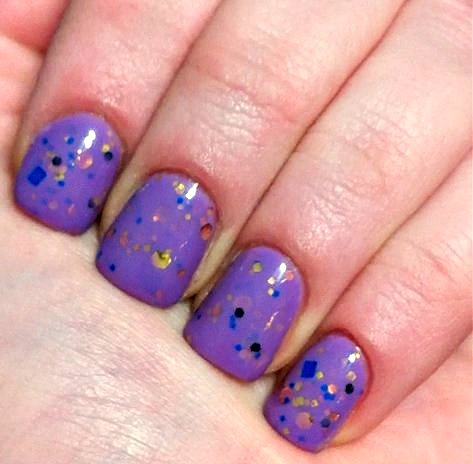
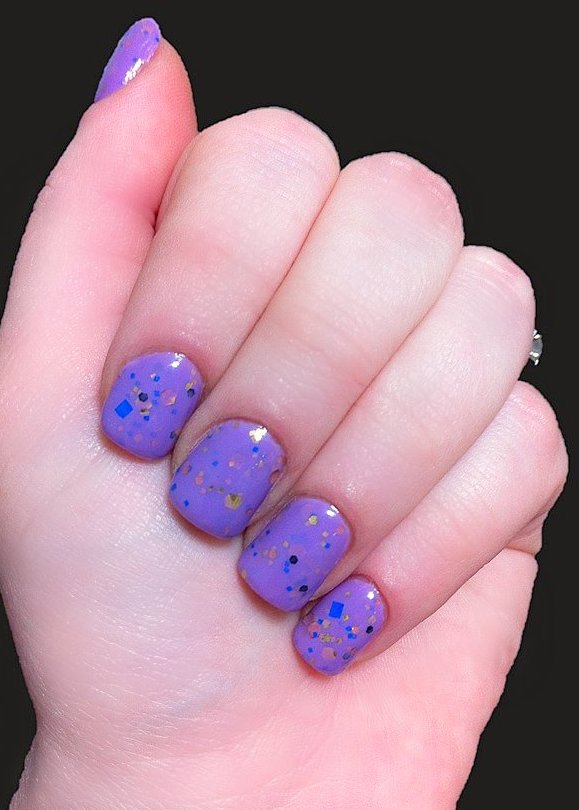
I'll admit that I put many coats of this polish on to get it opaque, but the polish wasn't the problem. I wasn't thinking, so I didn't let the formula 'speak' to me. You don't need a billion coats with BPFF, but medium coats work much better with it than thin coats. When I tried to do thin coats, I would accidentally wipe too much polish off the brush and most of the glitter went with it. I experimented later and found that medium coats make it an easy-peasy application with even glitter distribution. 


Two or three medium coats would probably bring you to opacity, or you could layer one or two coats over a base color.


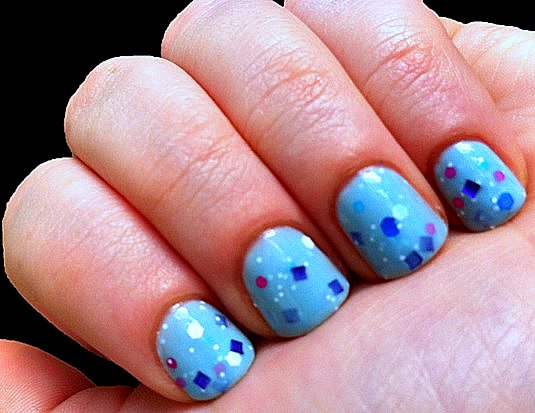
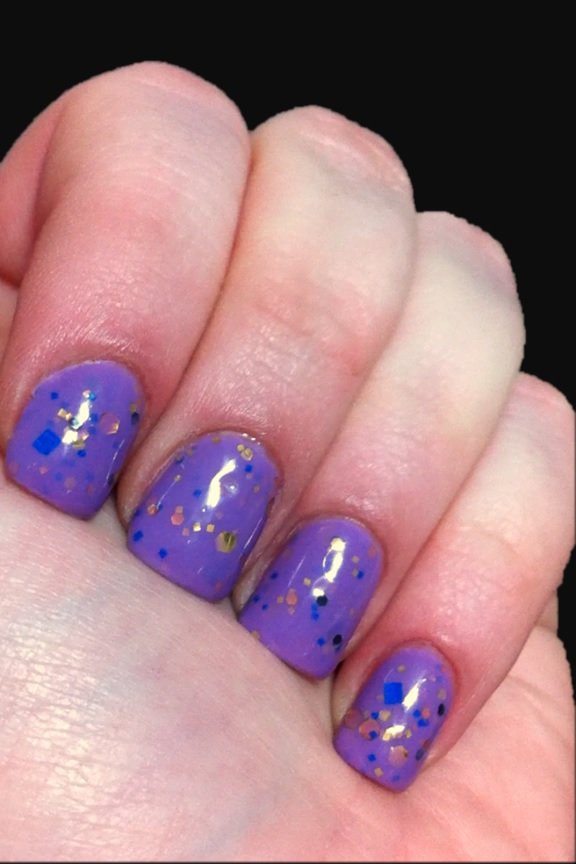
After I reached opacity, I topped it off with two coats of Seche Vite. Most of the glitter played really nicely and would lay flat on the nail. I had two or three of the purple squares that wanted to curl slightly. Speaking of the glitter, I love how the milky blue base still allows the glitter to stand out and be colorful. I especially love how the pink circles and the blue squares pop! 


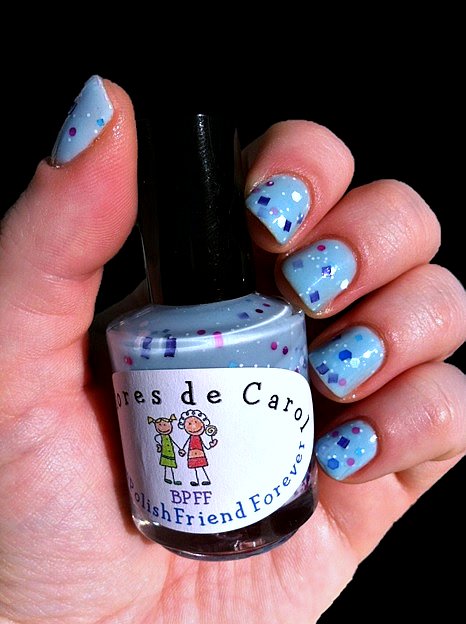
Here's the bottle from a distance and up close:


I think that BPFF is well suited for spring, but also an awesome all-year-round polish. As I mentioned in yesterday's post, there seems to be a transition going on right now between the original Colores de Carol bottles/labels and the new ones, so yours may or may not look different than mine. The new bottles look to be square; I am not sure about the labels.


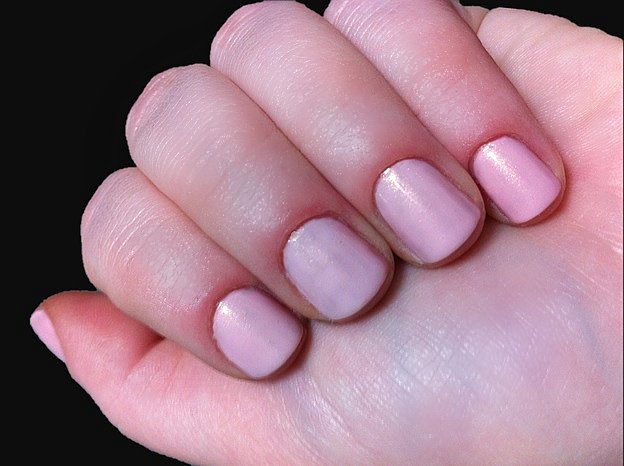
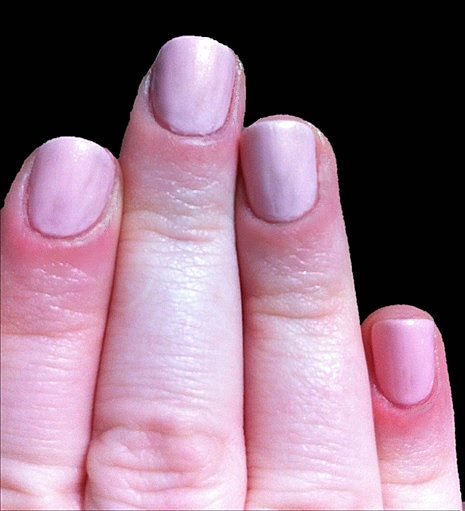
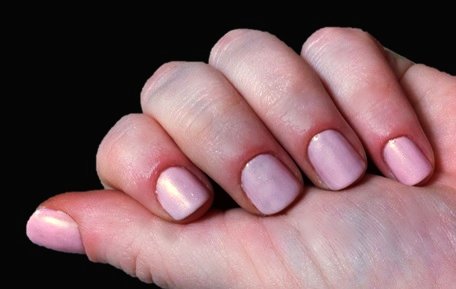
For me, it also worked nicely with my Seche Vite top coat. I didn't experience shrinkage (where the top coat dries so fast that it pulls back the edges of your polish) or chipping, and almost imperceptible tip wear after typing for a couple of days.


If you haven't already, you might also want to check out the Colores de Carol blog. Carolina does fantastic nail art and swatches. My personal favorite is her stamping.


Colores de Carol polishes are sold at $9.00 for a full-size bottle (15ml), and she sells them through her Big Cartel store: http://www.coloresdecarol.bigcartel.com/. Carolina also has some on sale right now for $7.00. She has some options listed for mini bottles as well, three for $13.50. Shipping is primarily to U.S.A., but if you discuss it with her, she mentions that she may be able to work something out for international shipping.
*I purchased this polish with my own money and I am not affiliated with or compensated by any of the brands mentioned in this post.*

Thanks for visiting!


Wednesday, March 27, 2013

Swatches and Review--Colores de Carol Cupcake Fantasy

Colores de Carol is a nail blog that I follow, written by the talented Carolina. She also recently started her own nail polish line. I was drawn to two shades right away, and those are the two that I have bought so far: Cupcake Fantasy and Best Polish Friend Forever. Today I will share Cupcake Fantasy, and leave BPFF for its own post.
*I purchased this polish with my own money and I am not affiliated with or compensated by any of the brands mentioned in this post.*

Two coats of Colores de Carol Cupcake Fantasy over two coats of Revlon Cotton Candy (left hand)
I started with one coat of base coat and two coats of Revlon Cotton Candy, which I posted about here. Seems like a sugary set of polishes, doesn't it?

One coat of Colores de Carol Cupcake Fantasy over two coats of Revlon Cotton Candy (left hand)
I proceeded to do three coats of Cupcake Fantasy and one coat of Seche Vite. You could easily skip the top coat if you wanted, as all of the glitter behaved well and didn't stick up.


Two coats of Colores de Carol Cupcake Fantasy over two coats of Revlon Cotton Candy (left hand)
Two coats of Colores de Carol Cupcake Fantasy over two coats of Revlon Cotton Candy (right hand)
My mani appears to be pink overall, being as that's the color of my base, but Cupcake Fantasy is actually pale lavender.


Here you can almost see how the base is more lavender
In Carolina's swatches, shown here, I see some larger purplish hexagonal glitter. I did not see any of this on my nail, but I also don't see it in my bottle. I haven't asked her about it since I was perfectly happy with what I received. 
EDIT: Carolina saw this post and she wants to send a new bottle that includes the hex glitter. What great customer service! Her polishes are all mixed by hand, so they are not going to be exactly the same, but she was very apologetic. I was happy before, and now I'm even happier. 

Three coats of Colores de Carol over two coats of Revlon Cotton Candy (right hand)
All of these photos are indoors under artificial light, as I didn't have time to take the photos during the day.

Three coats of Colores de Carol over two coats of Revlon Cotton Candy (left hand)
Communication, payment, and shipping were all pleasant and prompt when I ordered. I was able to get a shipping cost from Carolina before finalizing my order, which I appreciated. (I did, however, end up ordering when she had a special once for free shipping.)

Three coats of Colores de Carol over two coats of Revlon Cotton Candy (left hand)
If you order, your bottle may or may not look different than mine. I've shown a round bottle here, but I believe her new bottles are currently square. She mentioned new labels as well, but I haven't yet seen what they look like. She still has the older style of some bottles/labels in stock, too, as of today. 

Three coats of Colores de Carol over two coats of Revlon Cotton Candy (right hand)
Colores de Carol polishes are sold at $9.00 for a full-size bottle, and she sells them through her Big Cartel store: http://www.coloresdecarol.bigcartel.com/. Carolina also has some on sale right now for $7.00, so check it out. She has some options listed for mini bottles as well, 3 for $13.50. I am eyeing Bubblegum & Slippers, Daffodil, and Butterfly Blush.
*I purchased this polish with my own money and I am not affiliated with or compensated by any of the brands mentioned in this post.*

Monday, March 25, 2013

Swatches & Review--Revlon Cotton Candy

Let me start by saying that this polish--Revlon Cotton Candy--was frustrating to try to photograph. Most of the time, it just looked like the skin around the polish was stained by strawberries. The first photo below is the truest to what the polish looked like in person, in my opinion. All photos in this post were taken indoors under artificial light.
*I received this polish in a swap, and I am not affiliated with or compensated by any brands or companies mentioned in this post.*


Revlon Cotton Candy is a very pale pink with a nice shimmer. The shimmer looks kind of champagne to me in some lights, and silver in others.


As you can see in the photo below, the first coat of Revlon Cotton Candy was horrible, streaky and uneven. I was using a very thin coat except on the pinkie, which you can see turned out much better. So medium coats may work best with this polish.


Two coats looked far better than one, as shown below. Again, the pinkie was the best, illustrating the need for medium coats rather than thin ones in this case. 


The coverage was not enough at two coats, but I believe everything would have evened out nicely with three coats and top coat. I knew from the beginning that I was going to put another polish on top of Cotton Candy, so I did not follow up with a third coat or top coat.


The formula was somewhat thin and watery, but surprisingly it was easy to control. I had no issues with the polish trying to flood my cuticles.


This is a scented polish. Being as it's Cotton Candy, it simply smells sugary sweet. I did not notice the scent unless my hands were near my face.


If I had to summarize my review of Revlon Cotton Candy, I would say: Bad formula, great color. I wouldn't want to pay full price for it, but I adore the color, so it is totally worth keeping since I got it through a swap. It also makes a good base for sheer, creamy indie glitter polishes.


Revlon nail polish is available at most major retailers. Cotton Candy, in particular, is being offered by buymebeauty.com for only $2.99 here.

*I received this polish in a swap, and I am not affiliated with or compensated by Revlon.*

Saturday, March 23, 2013

Review and Photos--Emily de Molly Regal Beginnings

I'm sad that I haven't posted in a little while; I've been trying to figure out my new-to-me camera, but it hasn't worked yet. So, back to the old camera for now...
This polish was on my most wanted list for a year at least. Every time I saw it online, I practically drooled. It was unavailable in the U.S. for a while. I ended up buying it from a blog sale, but it is available in the U.S. through shop.llarowe.com now. This beauty is 'Regal Beginnings', made by the company Emily de Molly, from Australia. 
*I purchased Emily de Molly Regal Beginnings with my own money and I am not affiliated with nor compensated by any of the companies or brands mentioned in this post.*

Artificial light: Five coats 'Regal Beginnings', 2 coats Seche Vite
I agree with Emily de Molly's notes on this polish, from their Etsy listing (source):


"BASE - Medium purple jelly/creme.
GLITTER - Gold, blue and black.
Please be aware the larger gold glitter may get a reflective curl over time, but will apply easily and remain flat on the nail.
OPAQUE - in 2-3 coats depending on application."

The first time I wore 'Regal Beginnings', I applied just two coats and then topped with one coat of Seche Vite. I did not do my usual cleanup around the edges or use cuticle oil. I did not see any visible nail line after two coats, so there was good and even coverage. There were a couple of slightly curled glitters that were smoothed out when I applied my top coat. (Cilucia has a good explanation of 'reflective curling' glitter on her blog, if you're curious: http://cilucia.blogspot.com/2012/12/quickie-post-on-reflective-curling.html.) On Emily de Molly's Facebook page, the owner said that 'Regal Beginnings' wasn't available for a time while they worked out a glitter issue; I have no idea if the bottle I bought is older or newer, so you may have no curling whatsoever.

Natural light: Two coats 'Regal Beginnings', one coat Seche Vite
It was very easy to apply, I did not have to fish around for glitter, and I did not have to dab on to distribute the glitter. I love that the tinted base is opaque enough to build up to good coverage, but sheer enough to let the glitter show its true colors. I enjoy the overall combination of shapes and colors of glitter in this polish, but my favorites are the blue squares. Yes, there is still love for the classic hexagon glitter, but circles and squares are feeling more special to me at the moment. (I wish the polishes with star glitter would use smaller stars...maybe then they would lie flat on my nails.)

Artificial light: Five coats 'Regal Beginnings', 2 coats Seche Vite
I still wanted more opacity, since I'm a little compulsive about that. My nails were a little longer than they are now, so I preferred not to see through the polish when held up to a light. How silly of me, since it's not like I hold my nails up to a light in the natural course of my daily life. But, it is something I do in the unnatural course of my compulsive thoughts. Thus, I added three more thin coats of 'Regal Beginnings' on another day. 

Artificial light: Five coats 'Regal Beginnings', 2 coats Seche Vite
This time around I topped it with two coats of Seche Vite to calm down a couple disobedient glitter pieces. I received several compliments from strangers when I wore 'Regal Beginnings', and everyone asked me if I added the glitter to my nail polish or if it was in there already. 
Artificial light: Five coats 'Regal Beginnings', 2 coats Seche Vite
I actually took lots of photos of 'Regal Beginnings' outdoors in the sun, but they are currently trapped on the new-to-me camera while I wait for my husband to have time to figure out my failed attempt at using the software compatibility between the camera and my computer...or something like that. Sigh. Same for the pretty bottle shots. Emily de Molly bottles look simple and classy to me.

Bright artificial light: Five coats 'Regal Beginnings', 2 coats Seche Vite
I hope that you enjoy looking at my current favorite nail polish. As far as indie polishes go, I am partial to the creamy tinted bases with glitter.
Bright artificial light: Five coats 'Regal Beginnings', 2 coats Seche Vite
I would love to try other polishes from the Emily de Molly line to see if I love those, too. At the moment, I am especially eager to get my hands on (ha, or to get them on my hands!) these shades I've seen online: A Certain Shade of Green, Cosmic Forces, Harmony, Majestic Flight, Sakura, Studded Jeans, Split Personality, and Pyrite. Um, yes, I admit that is only my short list. 


Artificial light: Five coats 'Regal Beginnings', 2 coats Seche Vite
What do you think? Are you longing for any Emily de Molly polishes?


Closeup: Five coats 'Regal Beginnings', 2 coats Seche Vite
Purchasing information:
"Emily de Molly is currently only shipping within Australia. 
Emily de Molly is available from the following stockists with more to be added soon.
http://www.shoppe-eclectic.co/collections/indie-polishes/Emily-de-Molly
http://shop.llarowe.com/collections/emily-de-molly
http://www.norwaynails.com/"--(Source)
Prices vary depending on the stockist, but shop.llarowe.com usually has Emily de Molly polishes for $13.00. They sell out fast, but you can easily request them to send you an e-mail when they restock. 
*I purchased Emily de Molly Regal Beginnings with my own money and I am not affiliated with nor compensated by any of the companies or brands mentioned in this post.*


Monday, March 18, 2013

Shorty Post--Even Better Deal on Conscious Box!

I wish I had seen this deal before the other one I posted about: For first-time subscribers, you can order a Conscious Box from consciousbox.com for $1.00 by entering the Promotional Code FREEBOX. You have to cancel after your first box ships if you don't want the subscription to auto-renew and charge you for another box. The box typically contains a mix of food, household, and beauty items and is usually $19.95 for one monthly box. (I believe there are discounts for longer subscriptions.)

Conscious Box describes its service:


Conscious Box is the best way to discover the most ethical and sustainable products on the planet! Focusing on strict tenets of organic, fair trade, and pure and natural products, each month Conscious Box will introduce you to healthy and honest alternatives for every aspect of your life and for every member of your family. Discover the best natural products, earn points for leaving feedback and reviews, and buy your favorites at incredible discounts!

*I am not affiliated with Conscious Box and I have not been compensated in any way for this post.*

Saturday, March 16, 2013

Shorty Post--50% off Conscious Box

Coupon code: DETOX
This works on consciousbox.com. I didn't see an expiration date. It will only discount one box per order; it might be per customer/account, too, but I don't know for sure. Final total including shipping is only $9.97. I am not sure if you get a March or an April box if you order now. You have the option of ordering Classic, Vegan, or Gluten Free. If you only want one box, and not to receive one every month, remember to pause or cancel your subscription after your first order has shipped.

Once a month, Conscious Box sends out samples of environmentally friendly/natural products, usually including household, beauty, and food.

*I am not affiliated with Conscious Box and have not been compensated in any way for this post.*

Friday, March 15, 2013

Paired with Bold Red Lips...

It seems to be the times that I'm not going anywhere that I wear the most makeup. I think it's because I have a little more time to play with it and take everything off if the look fails. Here is the look I paired with my bold red lip from yesterday's post:


Let's focus on the eyes for a while, because that was the area of this look where I tried a new-to-me product, Kat Von D's True Romance Eyeshadow Palette: Art of Elysium--Evelyn, shown below. (It has a mirror inside in addition to what you see.) I think the packaging is super cute, feminine in an understated way.


The shade names: Top left is Enjoy the Silence, top right is Sand Timer, bottom left is Leather, bottom right is Tijuana.

I prepped my eyelids with Urban Decay Primer Potion in Original. (One of my so-called 'holy grail', or HG, products.) I then applied Sand Timer with a light hand from lash line to brow bone.


I applied Enjoy the Silence just to the inner third or so of my eyelid, up to the crease, as shown above. Next, I applied Leather to the middle third or so of my eyelid up to a little past my crease, shown below.


The darkest shade, Tijuana, I applied to the outer third or so of my eye. I brushed the shadow out into roughly a sideways V-shape. This is where your eyes start to look strange, like some sort of... Gothic Neapolitan ice cream?


When my eye shadow is applied in vertical strips like this, I start the blending process by using a soft crease brush to buff out the harsh vertical lines between the shades. I just use a few up and down motions with the brush until the shades flow into each other in a more progressive way.


Personally, I tend to use the same brush for my entire eye shadow process, just cleaning it between  dark and light shades. I used more of Enjoy the Silence to highlight just under my brow. Then I used Sand Timer again with a light hand and a motion like a windshield wiper, to blend horizontally between my three shades on the bottom and my highlight by the brow.


I used Missha Perfect Cover BB Cream in shade #21 all over my face, and L'Oreal True Match concealer in Fair/Light Neutral. I filled in my brows with some brown powder by Maybelline and an angled eyeliner brush. (I've used the brow powder so many times that I can no longer read the label to tell you the name of the product.) For eyeliner, I used a somewhat bold line of black liquid: L'Oreal Lineur Intense in Carbon Black.


I tamed my brows a little more with brow gel by Benefit. The mascara used is Maybelline The Falsies Volum' Express Black Drama, which I previously posted about here


I used the blush that I use most of the time, Laura Geller Blush-N-Brighten in Roseberry. This is an expensive blush to me, around $30, but I got it by using Birchbox points, their loyalty/rewards program. I only tap the brush onto the blush to pick some up, not sweep over it, to keep my blush unbroken for longer. Then I tap it onto my cheeks rather than sweeping it on, so it blends better.


Last but not least was freshening up my NYX lipliner (Hot Red) and lipstick (Chic Red) from yesterday's post.


*I am not affiliated with any of the brands mentioned and have not received any compensation or samples for this post.*